
![]()
Загрузить PDF
![]()
Загрузить PDF
Хотите отправить уникальную, креативную открытку кому-то в их день рождения, праздники или просто так? Используйте это простое руководство, чтобы сделать открытку в Adobe Illustrator!
-

С помощью инструмента «Rectangle tool» (прямоугольник) создайте рабочую область открытки. Открытки, как правило, имеют стандартный размер 5 дюймов на 7 дюймов (показанная здесь как прямоугольник №1), так что вы должны держать элементы вашего текста/фото в границах этой «Safety line» (безопасной линии). Прямоугольник № 2 является «Cutting line» (линия вырезки) или допуска вокруг вашей открытки, и должен быть больше, чем ваша линия «Safety line», около 0,25 дюйма.
-
Нажмите на линию №2 и выберите View > Guides > Make Guides. Создайте еще одну линию. Эта линия является линией печати, расширяя цвет фона полностью до краев вашей открытки. Установите ее больше, чем ваша линия вырезки, около 0,25 дюйма, таким образом она служит другим ориентиром.
-
Помните, №1 является «Safety line», №2 — «Cutting line» и №3 — «Bleeding line».
-
Общий вид будет, конечно, зависеть от типа открытки, которую вы хотите отправить. Эта открытка является примером поздравительной открыткой, поэтому картинка будет из воздушных шаров. Чтобы создать изображение воздушного шара или любого другого круглого объекта используйте инструмент эллипс, как показано здесь.
-
В этом примере стороны кружка сужаются вниз, так он начинает напоминать воздушный шар.
-
Чтобы добавить другие элементы на свою первоначальную форму, используйте любой из инструментов формы или даже инструмент для рисования от руки. Здесь нарисован маленький треугольник и расположен в нижней части шарика, как показано, затем плавно соединен с помощью Pathfinder > Add to shape area > Expand.
-
Для красного хамелеона с небольшим количеством блеска установите первый цвет: C = 1, M = 90, Y = 50, K = 0 и второй цвет на белый, с границей штриха = none. Используйте режим «Radial mode» для завершения этого шага.
-
Если вы хотите несколько таких форм, можно продублировать ваше изображение. Создайте новый круг и сделайте его подобным тени. Затем выберите круг и скопируйте оригинальный воздушный шар и перейдите в Pathfinder > нажать в Minus Front ( так называемый subtract from shape area — вычесть из формы области) > Expand. Перетащите тень на первоначальный воздушный шар и выберите Multiply для прозрачности. Возможно, вы захотите изменить цвет.
-
Вы также можете сделать ваши фигуры различных цветов или можете добавить тени с помощью «Pen tool». Используйте карандаш, чтобы нарисовать тонкие линии или другие детали, как здесь ниточки на воздушных шарах.
-
Если вы хотите написать над частью или всем вашим изображением, расположите их в рабочей области. Выберите нужную часть, в которой хотите написать, и установите ее прозрачность Transparency = 30, или больше, если хотите, чтобы фон был бледнее.
-
Если вы хотите какой-то эффект для текста, который ввели, можете зайти в меню Effect и выбрать его оттуда.
-
Это покажет вам, есть ли ваш текст слишком маленьким или слишком большим, или ваши изображения выглядят странно так, как вы расположили их. Если вы удовлетворены видом открытки, вперед — и распечатывайте, впрочем, столько, сколько вам нужно. Поздравляем — вы успешно создали свою собственную открытку в Adobe Illustrator!
Реклама


Об этой статье
Эту страницу просматривали 16 442 раза.
Была ли эта статья полезной?
Postcards in Illustrator are worth designing, especially when you want to go beyond writing a text-driven or lengthy letter to send to anyone. Postcards have more visual appeal as you design them with travel photography, retro stamps, promotional logos, and even beautiful stickers.

Build a Postcard in Illustrator Template – Step-by-Step Instructions
Adobe Illustrator marks a decent vector graphics application to create scalable postcard sizes and design such postcards according to any aesthetic or purpose you’re going for. Rest assured, making postcards in Adobe Illustrator won’t give you a hassle when you apply these simple steps:
Step 1: Open Adobe Illustrator and Create a Postcard from Scratch

Access Adobe Illustrator and you should know that the software itself already houses a free postcard template. When you make a new document, click “Postcard (288 x 560 pt)”, choose your preferred orientation for the postcard, finalize its layout presets, and click “Create” so you’ll have a postcard in Illustrator quickly.
Step 2: Look for a Postcard in Illustrator Template (Option 1)

Besides using Illustrator’s blank postcard template, move to Template.net and you can choose for premade, printable, and customizable postcard templates in Illustrator format. There is a landing page dedicated to postcards that are available in Illustrator and you simply choose from any of those editable examples.
Step 3: Search for a Postcard in Illustrator Template (Option 2)

Easily access the desired postcard template of your choice when you optimize the site’s search box. Found on the topmost part of your screen, write “postcard templates” on the search space and you should be able to see the whole collection of postcard-related templates and similar categories pronto.
Step 4: Pick a Postcard Template to Edit

Once you find the specific postcard template you like, click on it. You may click “Free Download” so that you can open the template in Illustrator shortly; however, you might want to edit it first so that it looks beautifully made once transferred to Illustrator.
Step 5: Edit the Template in the Editor Tool

Press “Edit This Template FREE” before downloading the template until you’ll notice that you are already in the Editor tool. Familiarize yourself with the entire tool’s interface so that you’ll quickly adjust to its features.
Step 6: Write on the Postcard

One of the basic things you can begin editing is the postcard’s text so be sure to click “Fill” on the left-side menu. As seen on the template’s font, you can type anything onto the text boxes may it be a name, position, contact information, website link, or any other message.
Step 7: Insert Styling Visuals

Tap on the “Graphics” button and you should be able to choose from various creative graphic designs such as illustrations, frames, stickers, and shapes. You can add any graphic to the template as well as resize or reposition each image until it goes exactly as how you want it to look.
Step 8: Design an Excellent Background

Don’t forget to select “Background” and choose from a range of background designs that can help improve the visual appearance of your overall postcard template. Whether you like backgrounds related to old America, a Hawaii vacation, Christmas in Mexico, a wedding, a holiday in Paris, London beach travel, or summer business, opt for a postcard background that relates to your purpose.
Step 9: Save and Download Your Work

Come up with the final edits to your postcard such as incorporating envelope logos, invitation messages, and other uploads until it is ready for download. Just head to the upper right corner, click “Download,” choose the high-quality resolution, press “Download,” and open it on Illustrator so you can continue to design and print it eventually.
Postcard in Illustrator Templates & Examples
There are countless postcard designs to choose from that besides Illustrator, you can also look for other postcards in Adobe Photoshop, PDF, and more formats. Here are some other editable postcard templates that you might want to consider for future use:
Vintage Postcard Template

Embrace retro vibes with a vintage postcard, especially when it has such a classic look that will always be worth appreciating. Often designed with old envelope colors, vintage photography, and classic stamps, you are sure to produce timeless postcards with vintage design.
Small Business Postcard Template

A small business postcard is recommended when you also want to market your small business in the postcard’s design. Expect to shower the small business postcard with the name of your business, your official business logo, and other promotional messages that are appealing to audiences.
Photographer Business Postcard Template

Feature one of the best photographs you actually shot in your own photographer business postcard. With an original sample photo and the name of your photography business, you are sure to build a brand out of your business.
Blank White Index Postcard Template
 Download Now
Blank Printable Postcard Template
 Download Now
Vintage Fall Wedding Invitation Postcard Design
 Download Now
Modern Church Postcard Template
 Download Now
Political Campaign Postcard Template
 Download Now
Business Agency Postcard
 Download Now
Simple Travel Postcard Template
 Download Now
Holiday Postcard Layout
 Download Now
Postcard Invitation Template
 Download Now
Sample Vacation Rental Postcard Template
 Download Now
Startup Business Postcard Template
 Download Now
Retro Postcard Template
 Download Now
Kids Summer Camp Postcard Template
 Download Now
Postcard Fall Wedding Invitation Template
 Download Now
FAQs
What are the types of postcards?
Some postcard types you can design in Adobe Illustrator are regular postcards, large-size postcards, block postcards, and panoramic postcards.
What is the standard postcard size?
The standard postcard size is usually around 3 and 1/2″ high × 5″ long × 0.007″ thick.
How much do mailing postcards usually cost?
In the US, the average value for mailing a postcard is only $0.48.
More in Blog
| How to Make/Create a Schedule in Microsoft Word [Templates + Examples] 2023 | How To Create/Build a Checklist in Google Docs |
| How to Make a Snapchat Geofilter on Photoshop | How to Make/Create a Family Tree in Google Docs [Templates + Examples] 2023 |
| How to Make a Checklist in Excel | How to Make a Family Tree in Excel |
| How to Create a Report in Excel | How to Make a Planner in Excel |
| How to Make/Create an Itinerary in Google Docs [Templates + Examples] 2023 | How to Make/Create a Cookbook in Microsoft Word [Templates + Examples] 2023 |
| How to Make/Create a Postcard in Illustrator [Templates + Examples] 2023 | How to Make an Invoice in Excel |
| How to Make/Create an Invoice in Microsoft Word [Templates + Examples] 2023 | How to Make a Cookbook Using Google Docs |
| How To Create/Build a Budget in Google Sheets | How To Make/Create a Billboard in Adobe Photoshop [Templates + Examples] 2023 |
| How to Make a Postcard in InDesign | How to Make/Create a Letterhead in Google Docs [Templates + Examples] 2024 |
| How to Make/Create a Postcard in Google Docs [Templates + Examples] 2023 | How To Make/Create an Invitation in Microsoft Word [Templates + Examples] 2023 |
| How To Make/Create a Postcard in Adobe Photoshop [Templates + Examples] 2023 | How to Make/Create a Postcard in Microsoft Word [Templates + Examples] 2023 |
| How to Make/Create a Rack Card in Microsoft Word [Templates + Examples] 2023 | How to Make/Create a Certificate in Microsoft Word [Templates + Examples] 2023 |
| How to Make/Create a Certificate in Google Docs [Templates + Examples] 2023 | How to Make/Create a Voucher in Microsoft Word [Templates + Examples] 2023 |
| How to Make/Create a Ticket in Microsoft Word [Templates + Examples] 2023 | How to Make/Create a Leaflet in Microsoft Word [Templates + Examples] 2023 |
| How to Create a Shared Calendar in Outlook | How to Create a Flowchart in Excel |
| How to Make/Create a Flowchart in Microsoft Word [Templates + Examples] 2023 | How to Make Address Labels in Word |
| How To Make/Create an Email Signature in Microsoft Outlook [Templates + Examples] 2023 | How to Make a Bar Graph in Excel |
| How To Make/Create a Fillable Form in Adobe PDF [Templates + Examples] 2023 | How To Make/Create a Pie Chart in Microsoft Excel [Templates + Examples] 2023 |
| How To Make/Create a Bar Chart in Microsoft Excel [Templates + Examples] 2023 | How to Make/Create a Resume in Microsoft Word [Templates + Examples] 2023 |
| How to Make a Timeline in Word | How To Make/Create a Survey in Google Forms [Templates + Examples] 2023 |
| How to Make a Fillable Form in Word | How To Make/Create a Timeline in Microsoft Excel [Templates + Examples] 2023 |
| How To Make/Create a Schedule in Microsoft Excel [Templates + Examples] 2023 | How to Make a Poster in PowerPoint |
| How To Create/Build a Resume in Google Docs | How To Make/Create a Timeline in Microsoft PowerPoint [Templates + Examples] 2023 |
| How to Make/Create a Calendar in Microsoft Word [Templates + Examples] 2023 | How To Make/Create a Calendar in Microsoft Excel [Templates + Examples] 2023 |
| How to Make/Create a Survey in Google Docs [Templates + Examples] 2023 | How to Make/Create a Form in Microsoft Word [Templates + Examples] 2023 |
| How to Create a Form in Excel | How to Make a Gantt Chart in Excel |
| How To Make/Create a List in Microsoft Excel [Templates + Examples] 2023 | How to Make a Chart in Excel |
| How to Make/Create a Budget in Microsoft Excel [Templates + Examples] 2023 | How to Make/Create Checklist in Microsoft Word [Templates + Examples] 2023 |
| How To Make/Create a Logo in Adobe Photoshop [Templates + Examples] 2023 | How To Create/Build a Chart in Google Docs |
| How to Make/Create a Label in Microsoft Word [Templates + Examples] 2023 | How to Make/Create a Chart in Microsoft Word [Templates + Examples] 2023 |
| How to Make/Create a Pamphlet in Google Docs [Templates + Examples] 2023 | How to Print Labels From Excel |
| How to Make/Create a Letterhead in Microsoft Word [Templates + Examples] 2023 | How to Make/Create a Brochure in Microsoft Word [Templates + Examples] 2023 |
| How to Make/Create a Pamphlet in Microsoft Word [Templates + Examples] 2023 | How to Make/Create a Business Card in Microsoft Word [Templates + Examples] 2023 |
| How to Make a Flyer in Microsoft Word | 50+ Roadmap Samples, Format & Examples 2023 |
| 50+ Mind Map Samples, Format & Examples 2023 | 50+ Family Tree Samples, Format & Examples 2023 |
| 50+ Email Signature Ideas & Examples 2023 | 50+ Media Kit Samples, Format & Examples 2023 |
| 50+ Receipt Samples, Format & Examples 2023 | 50+ Planner Samples, Format & Examples 2023 |
| 50+ Schedule Samples, Format & Examples 2023 | 50+ Quotation Samples, Format & Examples 2023 |
| 50+ Resume Samples, Format & Examples 2023 | 50+ Inventory Samples, Format & Examples 2023 |
| 50+ Itinerary Samples, Format & Examples 2023 | 50+ Email Signature Designs, Format & Examples 2023 |
| 50+ Analysis Samples, Format & Examples 2023 | 50+ Statement Samples, Format & Examples 2023 |
| 50+ Estimate Samples, Format & Examples 2023 | 50+ Memo Samples, Format & Examples 2023 |
| 50+ Policy Samples, Format & Examples 2023 | 50+ Invoice Samples, Format & Examples 2023 |
| 50+ Meeting Minutes Sample, Format & Examples 2023 | 50+ Notice Samples, Format & Examples 2023 |
| 50+ Budget Samples, Format & Examples 2023 | 50+ Checklist Samples, Format & Examples 2023 |
| 50+ Agreement Samples, Format & Examples 2023 | 50+ Catalog Ideas & Examples 2023 |
| 50+ Plan Samples, Format & Examples 2023 | 50+ Lesson Plan Samples, Format & Examples 2023 |
| 50+ Report Samples, Format & Examples 2023 | 50+ Magazine Ideas & Examples 2023 |
| 50+ Tumblr Banner Designs, Format & Examples 2023 | 50+ Pinterest Pin Designs, Format & Examples 2023 |
| 50+ Whatsapp Post Designs, Format & Examples | 50+ Twitter Post Designs, Format & Examples |
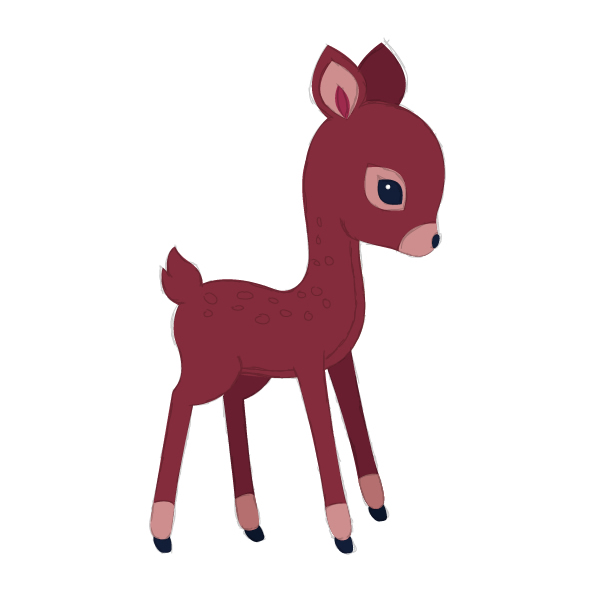
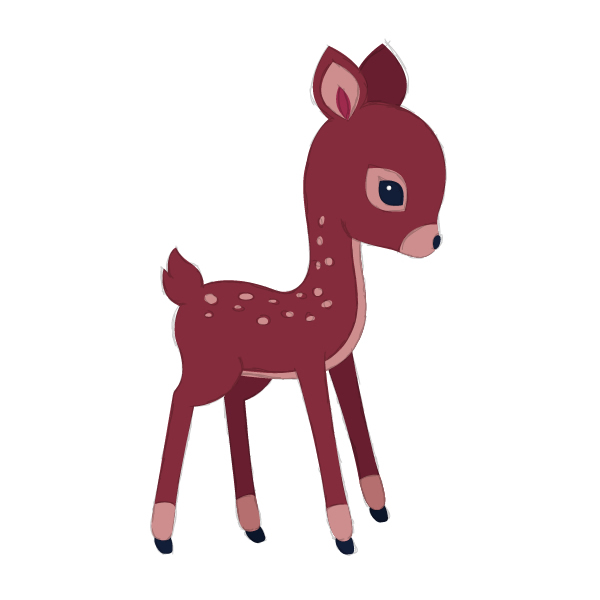
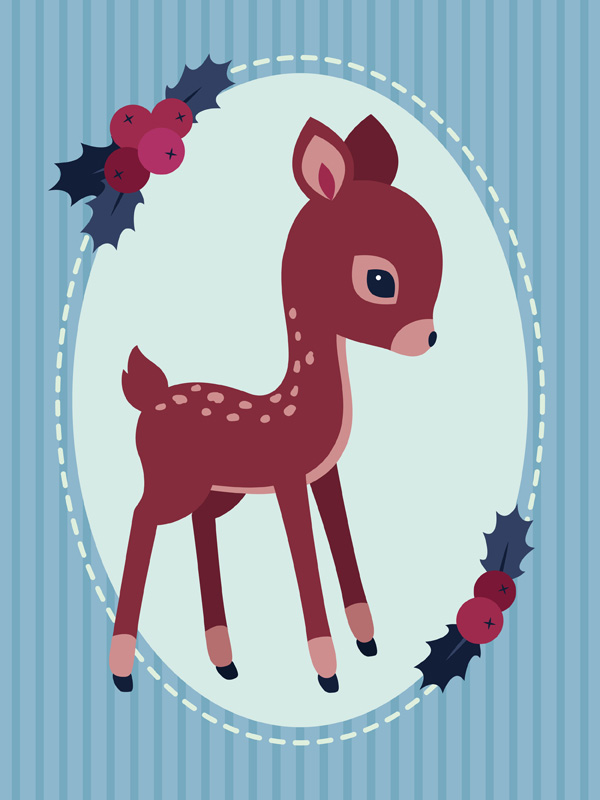
Из этого туториала вы узнаете, как создать винтажную поздравительную открытку с милым олененком. Вы можете сделать набросок его фигуры прямо в AI, а затем, с помощью инструмента «перо» сделать ровный лайн. Еще вы научитесь создавать детали вроде ягодок остролиста и незамысловатый фон с помощью простейших форм и инструментов. Итак, снежный лес, полный диких животных, и малыш-олененок, запрыгнувший в окошко вашего графического редактора погреться…

1. Создаем полосатый фон
Шаг 1
Откройте AI и создайте новый документ (Control-N). Сегодня, как ни странно, мы начинаем с фона. Выберите инструмент «прямоугольник» (M) и создайте прямоугольник: 600 пикс. в ширину и 800 высоту. Цвет заливки будет R=141 G=183 B=204.

Шаг 2
Поверх него поместите копию с цветом потемнее, вроде R=117 G=170 B=191, и сузьте его до полосы. Не меняйте высоту,лишь сократите прямоугольник по ширине!

Шаг 3
Теперь выберите эту темную полосу, зажмите Shift и Alt, и переместите копию полосы вправо. После этого воспользуйтесь Control-D, эта комбинация будет повторять последнее выполненное движение. Нажимайте столько раз, сколько нужно, чтобы заполнить весь фон полосами.
Теперь нужно все выровнять. Выберите все темные полосы, щелкните ПКМ и нажмите «объединить в группу» («Group»). Удерживая Shift, выберите светлый фон, в добавок к группе темных полос,и перейдите к панели выравнивания объектов («Align»). Нажмите Окно > Выравнивание (Window > Align) и выберите горизонтальный центр выравнивания (Horizontal Align Center).
Давайте назовем этот слой, чтобы не быть невеждами. Перейдите к панели слоев (Layers), щелкните дважды по существующему слою, и в появившемся окне напечатайте полосатый фон, и, затем, ОК.

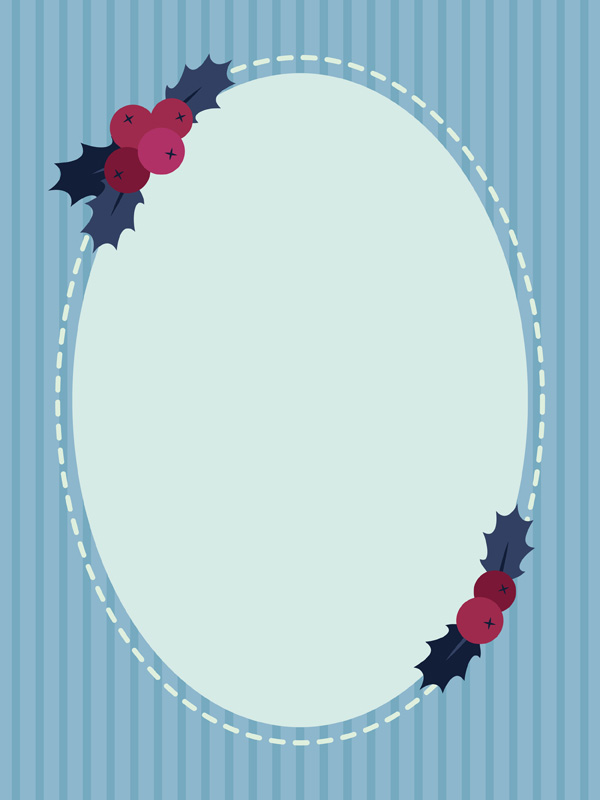
2. Создаем овальный фон
Шаг 1
Создайте новый слой и назовите его овальный фон. Заблокируйте слой полосатый фон (должна появится иконка в виде замочка).
На новом слое выберитеинструмент «эллипс» (L) и создайте овал с цветом заливки R=214 G=234 B=230.
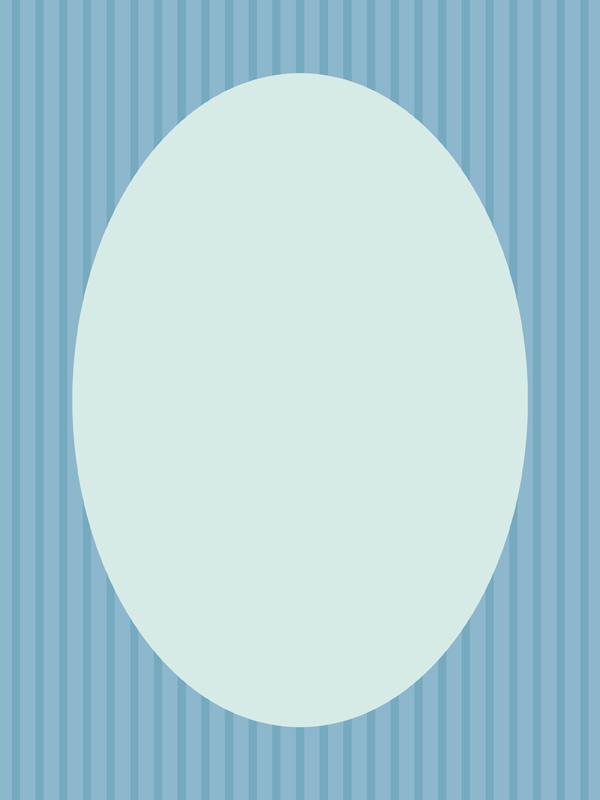
Шаг 2
Выделив светло-голубой овал, перейдите к Object > Path > Offset Path (Объект > Контур > Создать параллельный контур). В появившемся окне установите параметры в полях: Offset 15 px, Joins — Miter, Miter Limit 4. Жмите ОК. Удалите цвет заливки нового овала, создайте обводку, увеличив ширину на панели обводки (Stroke).

Шаг 3
Снова обращаемся к панели обводки (Stroke) и меняем сплошную линию контура на пунктирную (Dashed Line). Установите значение 12 pt и сделайте обводку шире.

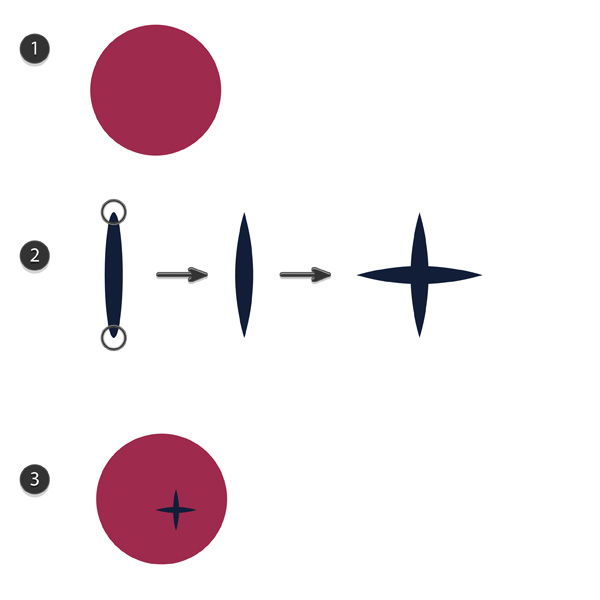
3. Создаем ягодки остролиста
Шаг 1
(1) Меняем цвет заливки на R=158 G=42 B=77. С помощью эллипса (L)создаем кружочек, зажав Shift.
(2) Теперь создадим чашелистик ягоды, используя овалы с цветом заливки R=18 G=29 B=56. Чтобы сделать овалы вытянутыми и острыми, нужно воспользоваться редактором опорных точек (Convert Anchor Point Tool). Вызовите его с помощью Shift+C. Потяните за опорные точки. Затем, выделив получившийся эллипс, воспользуйтесь инструментом вращения (R). Нажмите Enter, чтобы появилось окно. Введите значение 90 гр. и нажмите «Копировать» (Copy).
(3) Поместите чашелистик на ягоду.
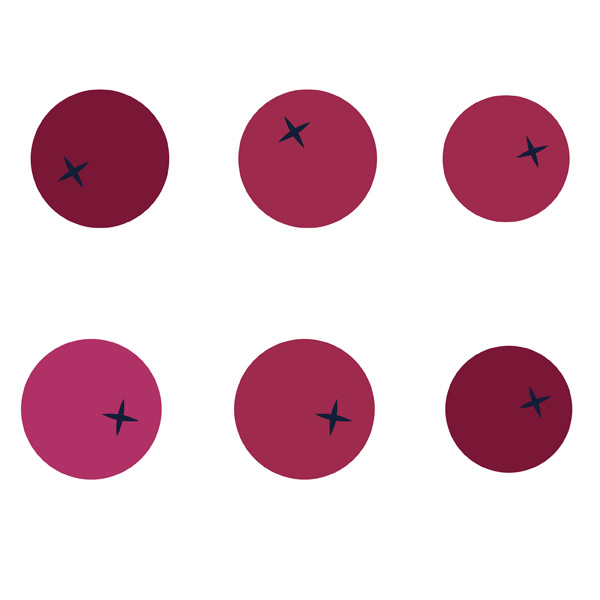
Шаг 2
Создайте несколько ягод с помощью функции копирования. Меняйте их оттенок, делайте чуть светлее или чуть темнее. Элементы каждой ягоды соберите в группы (Выделить > ПКМ > Group).
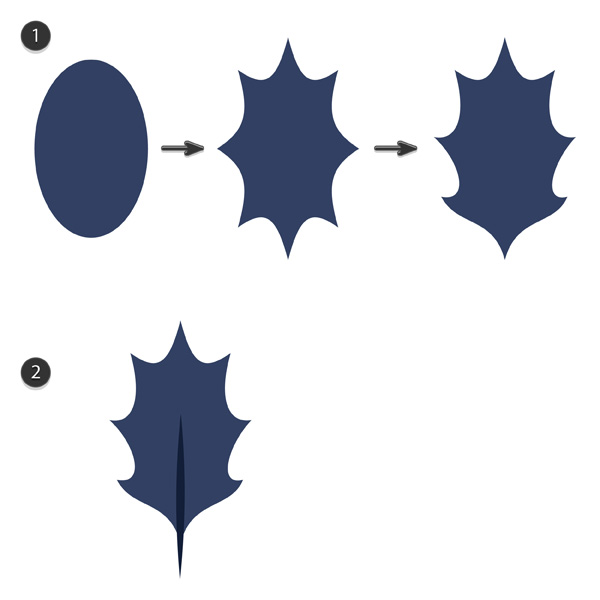
Шаг 3
(1) Давайте создадим лист остролиста. Начнем с создания эллипсас цветом заливки R=50 G=65 B=99. Выбрав эллипс, перейдите к Object > Path > Add Anchor Points (Объект > Контур > Добавить опорные точки). Затем жмите Effect > Distort & Transform > Pucker & Bloat (Эффект > Деформация > Сморщивание и раздутие). Перетащите слайдер на -25%. Растяните лист с помощью Object > Expand Appearance (Объект > Преобразовать вид). После этого, с помощью инструмента непосредственного выбора (Direct Selection Tool , «A»), придайте листу необходимую форму, передвигая точки.
(2) Скопируйте вертикальную часть созданного ранее чашелистика ягоды и поместите его в основании листа. Объедините элементы листа в группу (ПКМ > Group).
Шаг 4
Разместите ягоды и листья поверх фона так, как считаете нужным и привлекательным.
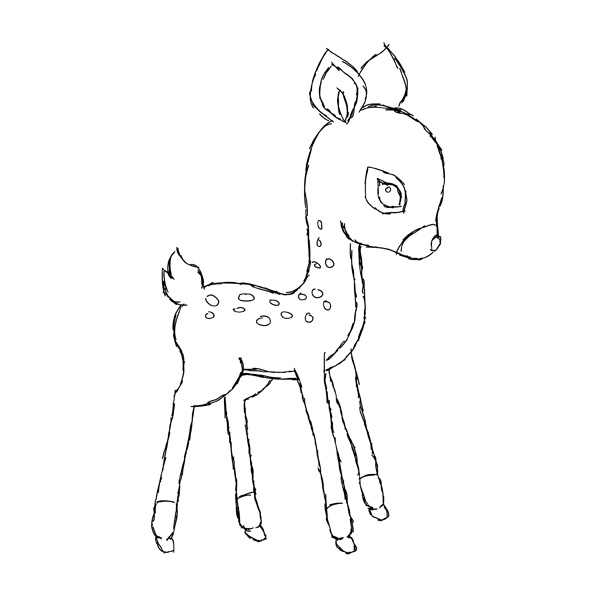
4. Рисуем олененка
Шаг 1
Заблокируйте слой, с которым мы работали только что и создайте новый слой скетч олененка.
Я создала этот скетч прямо в AI с помощью карандаша (N) и ластика (Shift+E). Можете следовать моему рисунку, или придумать свой. Кликните дважды на инструменте карандаша и в появившемся окне с Tolerances установите Fidelity 3 пикселя, а показатель Smoothness около 30%. Затем обратитесь к панели обводки. Установите значение в 1 пиксель.
После того, как закончите свой скетч, выделите все элементы слоя (Ctrl+A), перейдите к панели Transparency (Прозрачность) и установите значение около 20%. Заблокируйте слой с олененком.
5. Создаем фигуру олененка
Шаг 1
Создайте новый слой олененок ПОД слоем скетч олененка.
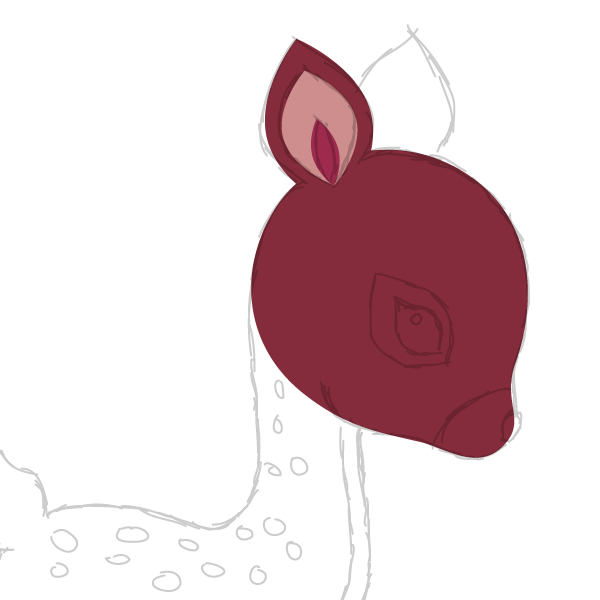
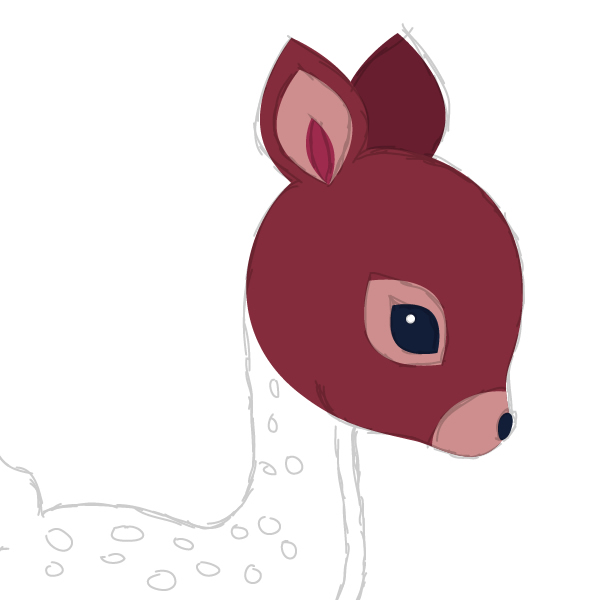
Чтобы создать фигурку олененка, мы будем использовать инструмент Pen Tool (P). Начнем с самого легкого: возьмем эллипс (L) и создадим круг. Цвет заливки будет R=132 G=44 B=59, без обводки контура.
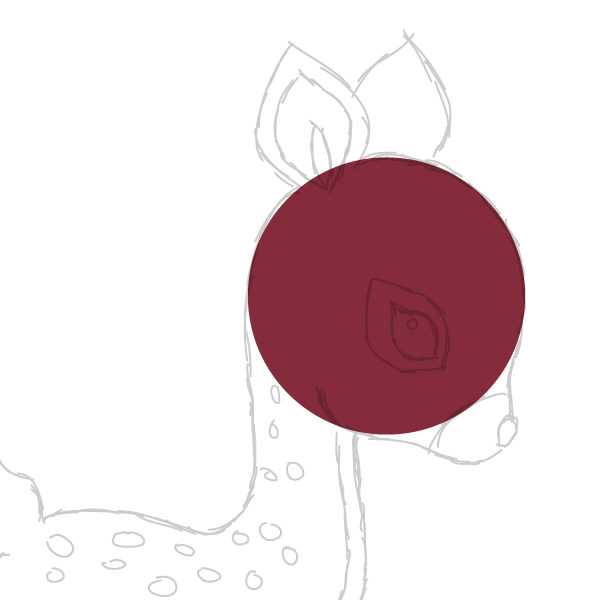
Шаг 2
С помощью Pen Tool (P) создаем новые опорные точки на круге, а с помощью Direct Selection Tool (A) двигаем опорные точки, чтобы вытянуть фигуру по форме головы олененка.
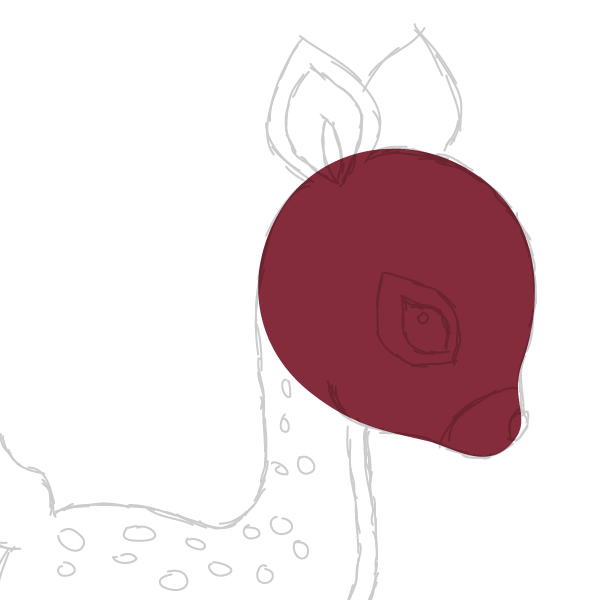
Шаг 3
Добавляем ухо, используя те же приемы, что и при создании чашелистика.

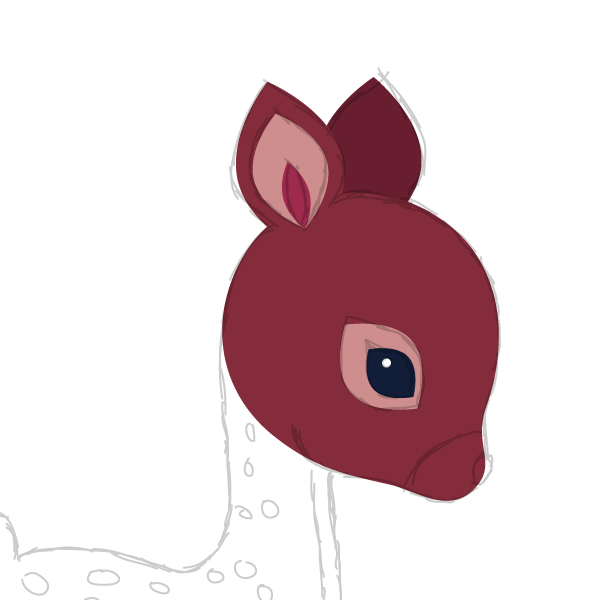
Шаг 4
Добавьте больше деталей. Меньшую часть уха залейте цветом R=206 G=142 B=142, а самую маленькую — R=158 G=42 B=77.
Шаг 5
Создайте другое ухо, за уже существующим (Control-X, Control-B). Цвет заливки R=104 G=30 B=46.

Шаг 6
Теперь добавим глазик. Зажимая Alt, скопируйте среднюю часть уха на место, где должен быть глаз. И еще одну, меньшую копию с цветом заливки R=18 G=29 B=56, для самого глаза. Добавьте белый блик в углу глаза.
Шаг 7
Нарисуйте круг с заливкой R=206 G=142 B=142.
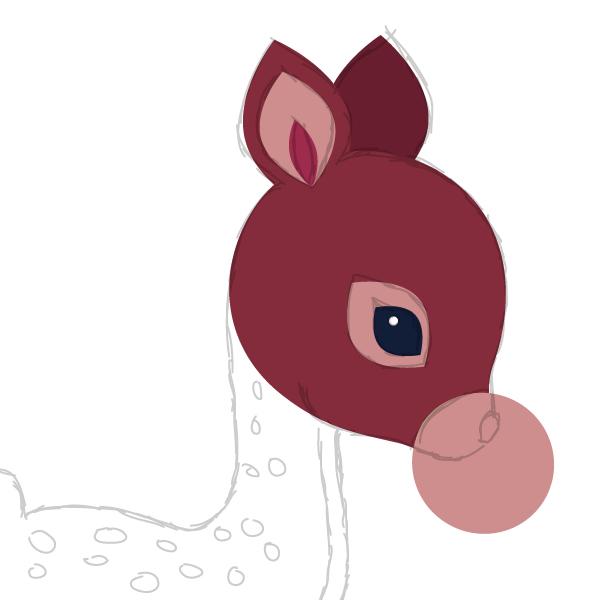
Шаг 8
Выделите голову и сделайте еще одну копию поверх (Control-C, Control-F). Удерживая Shift, выделите эту новую копию вместе с кругом из предыдущего шага. Воспользуйтесь панелью Обработки контуров (Pathfinder panel), установите тип взаимодействия Intersect .
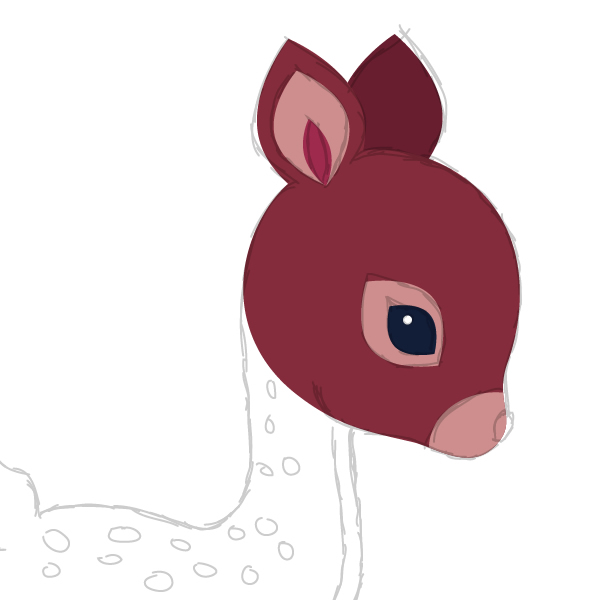
Шаг 9
С помощью Pen Tool (P) создайте нос с цветом заливки R=18 G=29 B=56.
Шаг 10
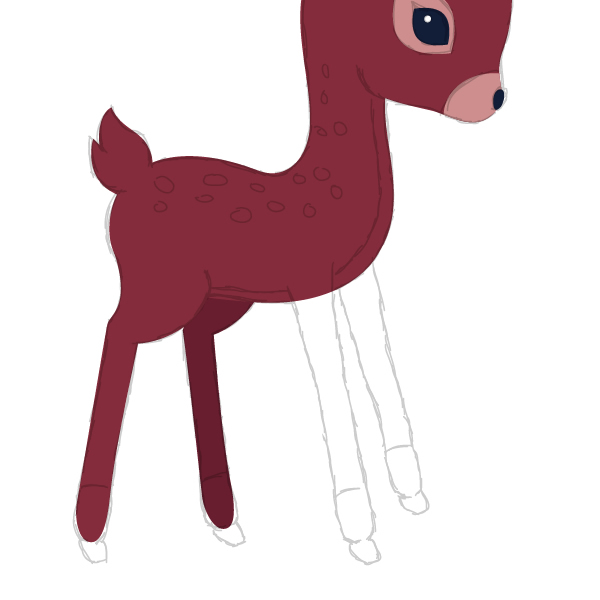
Создайте тело с помощью Pen Tool (P).
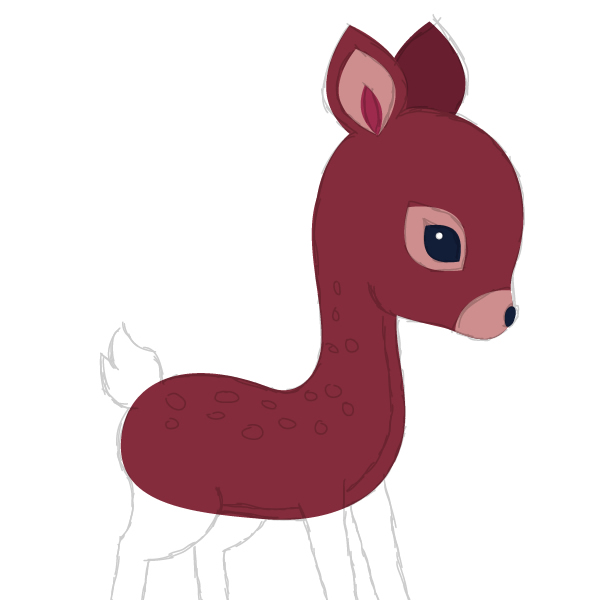
Шаг 11
Создайте маленький милый хвостик.
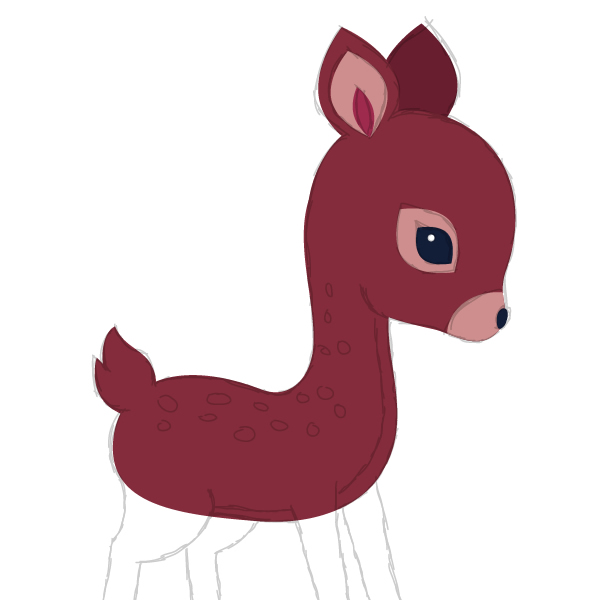
Шаг 12
Продолжайте, создайте ножки.
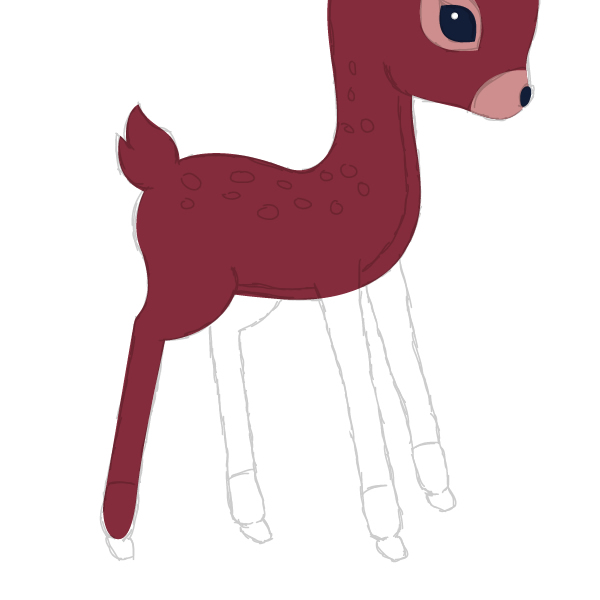
Шаг 13
С помощью пипетки (I) выберите цвет уха, которое позади и залейте им ножки, находящиеся позади.
Шаг 14
Теперь передние ноги, напоминаю цвет заливки: R=132 G=44 B=59.
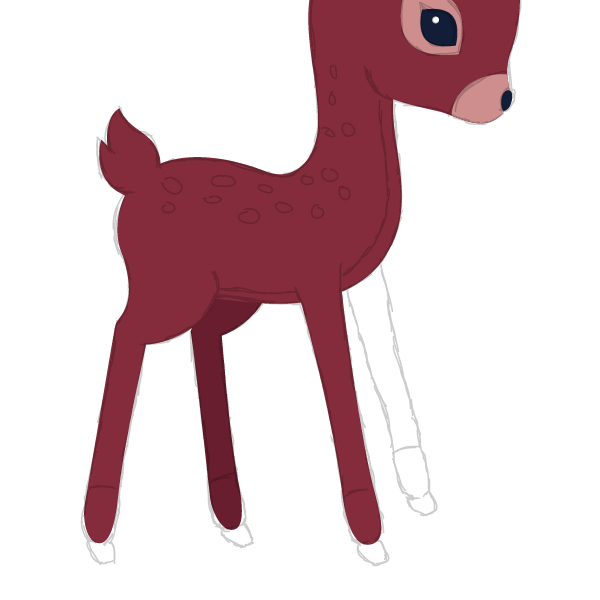
Шаг 15
И вторая передняя нога, более темного цвета.
Шаг 16
В соответствии со скетчем, нарисуйте «носочки». Для ног, что ближе, используйте цвет заливки R=206 G=142 B=142, а для тех, что дальше — R=181 G=111 B=111.
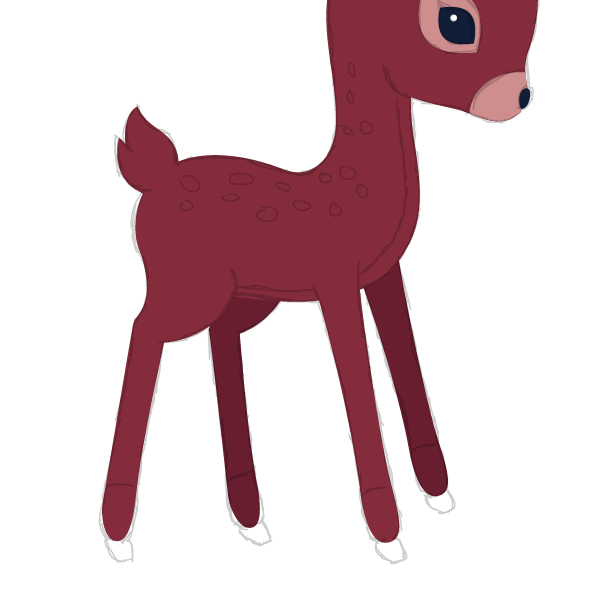
Шаг 17
Теперь копытца. Копытца поближе должны быть цвета R=18 G=29 B=56, копытца дальше — R=12 G=22 B=43.
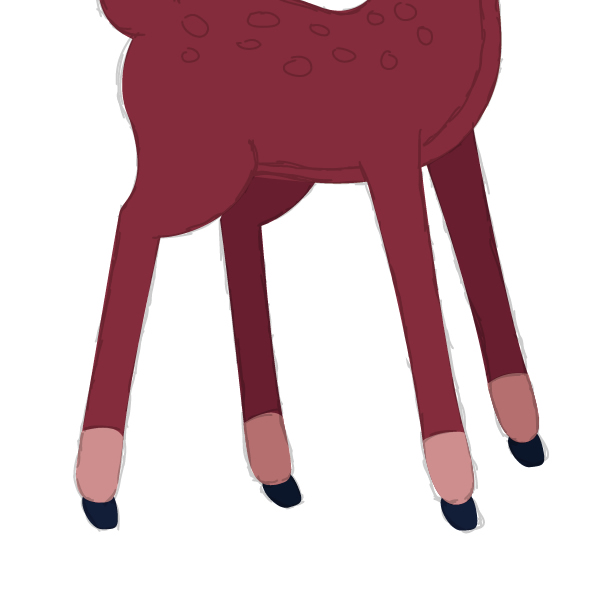
Вот какой получился олень!
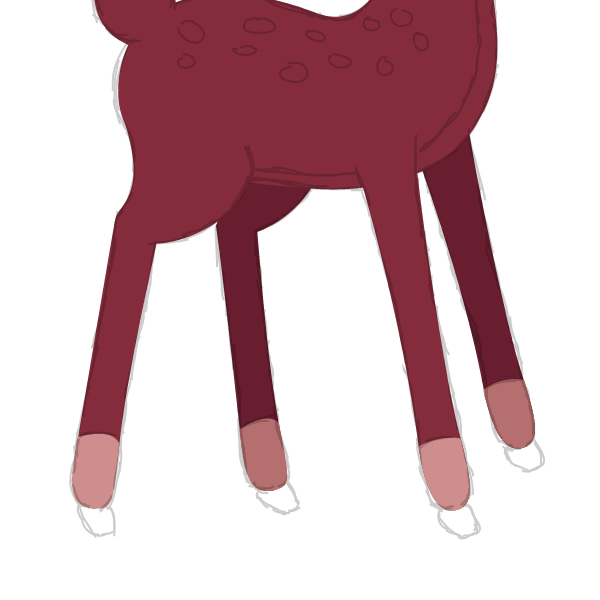
Шаг 18
Теперь давайте добавим некоторые детали. Зажимая Alt, слегка перетащите тело олененка по диагонали, как показано на рисунке. Выделите область тела (не ту копию, что вы сделали только что) и поместите копию поверх (Control-C, Control-F). Не убирая выделение, выделите и копию, смещенную по диагонали. На панели обработки контуров (Pathfinder) установите Minus Front.
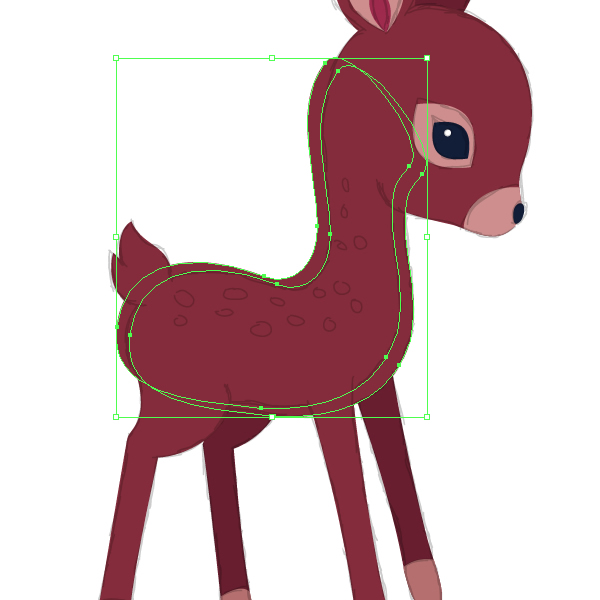
Шаг 19
Залейте новую форму цветом R=206 G=142 B=142. Разместите голову с её элементами поверх остальных частей тела (Control-X, Control-F). Убедитесь также, что ноги расположены правильно.
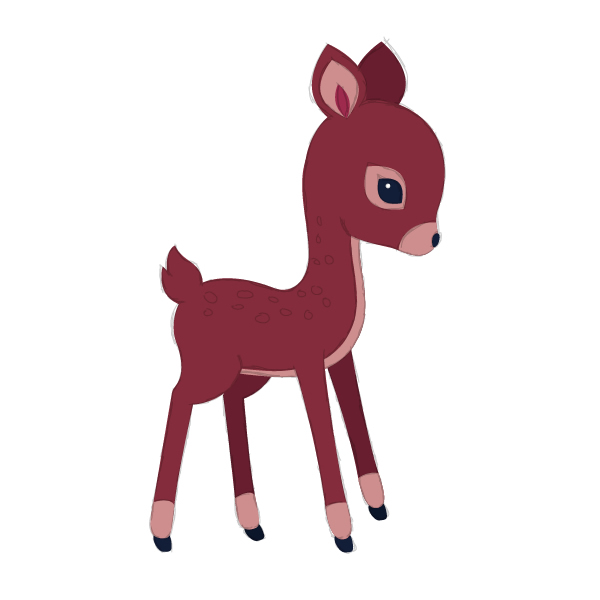
Шаг 20
Воспользуйтесь инстурментом Blob Brush Tool (кисть-клякса) (Shift+B), цвет заливки R=206 G=142 B=142, и разместите на спине пятнышки.
6. Размещаем олененка на фоне
Выделите всия олененка и установите его поверх созданной открытки. Слой со скетчем можно смело удалять.
7. Последние штрихи
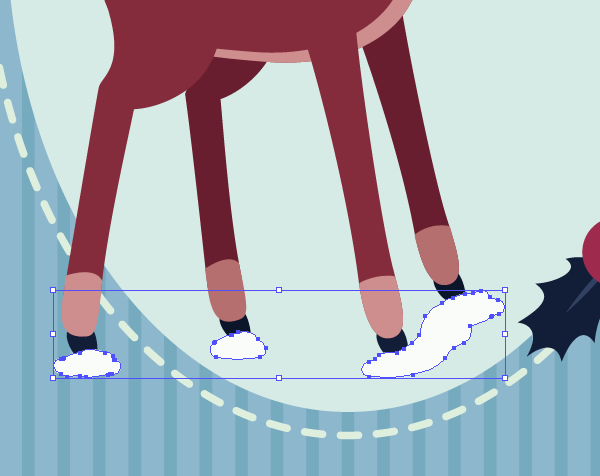
Шаг 1
Возьмите Blob Brush Tool (Shift-B), кисть-кляксу, и создайте снег. Без заливки, цвет обводки: R=247 G=251 B=246. Двойной клик при Shift-B покажет опции. Установите: Fidelity 3 pixels, Smoothness 30%; на панели установок кисти: Размер — 10 pt, Угол — 0гр., Сглаживание 100%. ОК. Рисуйте снег!
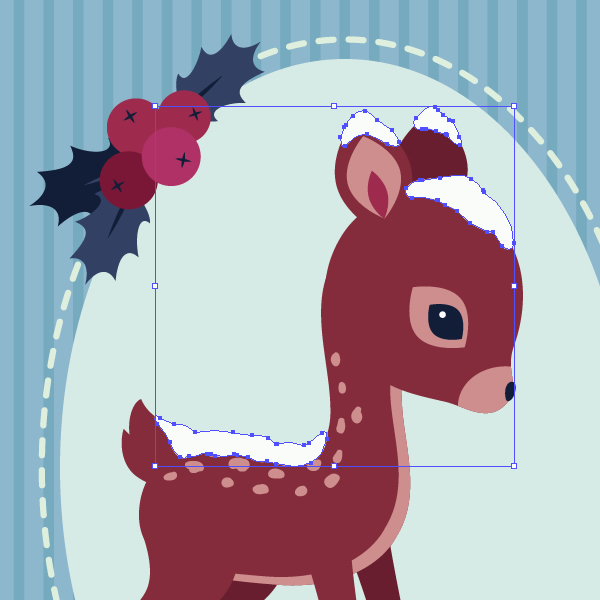
Шаг 2
Дорисуйте снег на лоб и ушки.
Шаг 3
И снежинок в воздухе!
Всё, любители открыток получили, что хотели. Отличная иллюстрация! Можете добавить текст. Или не добавлять. Как хотите, лишь бы вам самим нравилось!
Adobe Illustrator is a perfect app to quickly create digital and printable greeting cards.

Before you start
- Identify the purpose and sketch out the design. It could be for an appreciation note, a thank you note, a seasonal greeting, a birthday wish, anything…
- Choose the dimensions and orientation of your card for both print and/or web.
Take your first step
- Check these sample files: File1, File2, File3
——————————————————————————————
Parichay Banerji, a passionate Graphic Designer at Adobe, has designed this beautiful greeting card to wish his friends a happy new year.

We’ll feature select creations on our social media channels with proper credits, and of course, after your consent.
Spring has arrived! Let’s greet this amazing season with a
beautiful lettering illustration. Of course, we’ll add some floral
decorations, love, passion, and creativity!
Today, you’ll learn
how to create digital writing in Adobe Illustrator to make some elegant
lettering with floral elements for our gentle, ornamental composition.
Ideally, it would be great to have a pen tablet for this tutorial for
your convenience. We will also use the Width Tool, the Pen Tool, and the
Arc and Line Segment Tool.
If you’re looking for some decorative vectors, you can find many different elements and designs on GraphicRiver.
OK, let’s get started!
1. How to Create Digital Hand Lettering
Step 1
After
opening your Adobe Illustrator, create a new document with 850 x 850 px
Width and Height. Our illustration will be placed on a dark grey
background. So let’s create a dark-grey rectangle with the Rectangle
Tool (M).


Step 2
Now, let’s start writing. Remember that
it doesn’t have to be perfect because we just need to mark where the
real letters will appear.
So that we can write legibly, let’s
get some help: the Rulers. To make them appear, go to View > Rulers > Show Rulers (Control-R). Take
the upper ruler and drag it down to the place where you want to write.
Repeat this action to make another ruler appear, so that you have two
lines between which you can place your letters.
Now that
you’ve prepared where you want to write, let’s begin writing using the
Pencil Tool (N) with no fill color. If you make a mistake, you can
always erase it using the Eraser Tool (Shift-E). It’s easier if you can
see the whole artboard (Control-0), because the smaller the letters you
write, the less your hand will shake.


Step 3
Lower the
Opacity on the Transparency panel of this layer, close it, and create a
new layer.
On the new layer, take the Pen Tool (P) and outline the word
«Hello». I recommend the Pen Tool because you won’t have a lot of anchor
points which make your file heavier, as you would with the Brush Tool (B).
Write each letter separately, since it will be easier for you to manipulate the letters later. Begin by writing simple letters and then
add some curly decorations later.


Now you can add some curls by
manipulating the handles of the anchor points. If you want to connect
two letters, select the anchor points that you want to connect using the
Direct Selection Tool (A), right-click the mouse, and select Join.


Step 4
Now it’s time for the next word, “Spring”.
Close
the upper layer, where you wrote using the Pen Tool (P), and unlock the
bottom one, where you will write the new text. Make sure that you’re in
the bottom layer and create another couple of rulers below the first two
rulers that you made, where you want the second word to be placed.
Simply take the upper ruler and drag it down. Do this action twice to
get a pair of rulers as boundaries for your letters. Using the Pencil
Tool (N) with no fill color, write the word “Spring”.
For better visibility, you can increase the bottom layer Opacity.


Step 5
Similar
to what we did before with the word “Hello”, lock this layer, lower the Opacity, and go to
the upper layer. Next, select the light-cream or yellowish stroke color, and by using the Pen Tool (P), outline the word «Spring». When you are
finished, add some curls to the letters by manipulating the handles of the
anchor points.


This is my result. Feel free to do something similar to this.


Step 6
Look
at the Layers panel, take the layer where we drafted the letters (the
non-decorative letter layer), and drag it to the trash icon (Delete Selection). Press
Control-R to hide the Rulers. Select the lines on your artboard (you placed letters between them) and press Delete on the keyboard.
This is what our lettering now looks like:


2. How to Create Floral Details
Step 1
Now we’ll add some spring floral details. Let’s make the first type of leaves.
Set
the stroke color to green with no fill color. Using the Arc Tool, draw
the stem of our leaf. Add a few lines from both sides of the stem by
using the Line Segment Tool (\) or the Arc Tool, if you prefer. Make sure to check Round Cap on the Stroke panel.
We’ll transform these
lines into leaves by using the Width Tool (Shift-W).
Hit the Width Tool (Shift-W) and place your mouse/pen tablet over the
“prospective” leaf. Stretch where the leaf should be thicker. Repeat
with the rest of the leaves.


Make a few of these leaf branches.
Finally, we need to expand the lines which were transformed. Select
them and go to Object > Expand Appearance, and then Object >
Expand. (The first time you expanded just the leaves, and then the second time the stem).


Step 2
For the second type of leaves, we’ll use
the Arc Tool again to draw lines in two colors: lighter green on the back
and darker green over it. Change the width of these lighter lines with
the Width Tool (Shift-W). Expand all lines (Object > Expand
Appearance, Object > Expand) and make the leaf edges sharper by
moving the handles of the anchor points (use the Direct Selection Tool (A)).


Step 3
Now
we will create a rose. Add a pink circle with no stroke color and pink
fill color (feel free to choose any shade of pink). To make an even
circle, draw an oval using the Ellipse Tool (L) while holding down the
Shift key.
Now add some outer petals. Remove the fill color and make the
same stroke color (Shift-X) as used for the circle. On the Stroke
panel, increase the Weight of the stroke and check Round Cap. Grab the
Pencil Tool (N) and start drawing curly petals, which will be the
outside of the circle.
To make the inner petals, decrease the
Weight of the stroke, and make the stroke color slightly darker. Using
the Pencil Tool (N), create inner petals as shown in the image below. Add
some lighter petals as well.


Step 4
In this step, we will
create a flower bud. Add a pink circle with no stroke color and pink
fill color. Make two copies of this circle with slightly darker
color and place them behind the first circle (Control-X, Control-B).
Add the fourth copy of the circle behind and make it darkest. Add a few
black lines with the Pencil Tool (N) (just grey stroke color), behind
the first circle as stamens. And finally, create a green oval behind all
petals of the bud as a receptacle.
Expand the stamens. You can select the whole bud, go to Object > Expand, and in the new dialogue window select Stroke and press OK.


Step 5
For the third type
of flowers, let’s use the Line Segment Tool (\) again and draw a few
petals as lines. Use the Width Tool (Shift-W) to change the width of
these lines and create petals. Add a tiny circle inside the flower.
Yellow fill color with no stroke. Isn’t it easy? Finally, expand these
lines. Go to Object > Expand.


Step 6
Create a similar but
smaller, white colored flower using the steps we just took. Use the
Line Segment Tool (\) for the white petals, deform the lines with the Width
Tool (Shift-W), add the yellow circle inside, and finally, expand these
lines (Object > Expand).


Step 7
Here are all the floral
elements that we just created. Before moving on to the next step, make
sure that you have expanded all of them (Object > Expand Appearance,
Object > Expand).


3. How to Arrange the Floral Elements
Step 1
Make a few copies of the dark green leaves and spread them over and under the letters.


Step 2
Select the other leaves that we created, make a few copies, and place them also around the text.


Step 3
Now it is time to place a few copies of our beautiful rose.


Step 4
Add some of the flower buds.


Step 5
Scatter a few small red flowers.


Awesome Work, You’re Done!
And last but not least, let’s not forget to place our tiny white flowers. With this, we will finish our illustration.
Congratulations! Our spring lettering card is ready! Great job! I hope you’ve enjoyed following this inspirational tutorial and discovered some new tips and tricks that will help you to design more lettering designs and floral compositions. Enjoy the spring, and have fun!


